Like any good millennial kid, I have lived through the launch of Snapchat, then Instagram stories. Can you actually believe that I started my account before insta stories even existed?! Anyhow, as an illustrator, I love to create characters and share cute messages. And I’ve dabbled in animation once or twice…

Why animation is Illustration’s sibling
What I love about animating a drawing is that you can give it that extra depth. For me, drawing is all about feelings, and by making a 2D drawing move, it makes it even more real, more sympathetic.
how to create instagram stickers like a pro
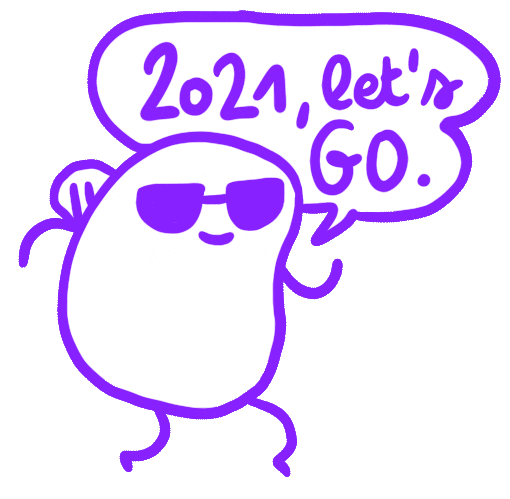
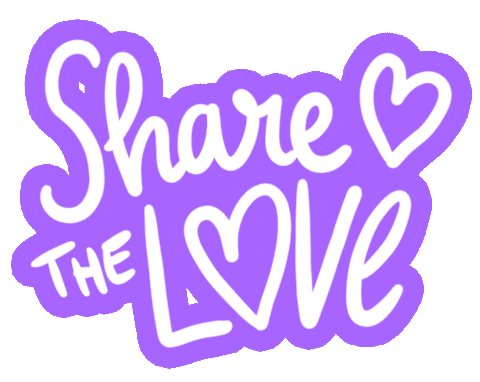
You will find in this article a 5 steps tutorial on how I create my wonderful GIFS and STICKERS (that you can find right here) and maybe this will help you get your creative juices flowing! I will be using my Ipad Pro with Procreate then later Photoshop on my computer (You could also do everything via Photoshop).
- Benchmark
- Batch drawing
- Animate
- Compute and export
- Share them everywhere!

Step 1: benchmark and find what you like
Have a look via Instagram at the trending stickers, type some key words; what strikes you the most? Which style works best on stories, and which type of stickers are not readable enough? This will help you fine tune your ideas and have an opinion on what to create.
At this time, you should also look for theme inspirations: something about a special event, a season, or a specific mood, etc. By looking at the designs on your phone at actual size you can also see the right definition and the level of detail you can achieve (This is not the right project for a super intricate drawing).
Once you have your inspiration settled, we can move to step 2!

Step 2: saving time by batch drawing
Do you know the science behind Batch Cooking? “The concept (…) is to spend a set amount of time cooking with an end result of having enough meals to last through the whole month.” (thanks Wikipedia)
Well, the idea here is: since making a single small drawing can be done quickly and that the end result will be a single small animation, we will do a whole bunch of small animated drawings in almost the same time as making one and we will have at the end a bunch of small animations, making it super rewarding.

Don’t forget to draw on a layer that is transparent and not solid white as we will need them with no background later on!
The first great thing is that you will get the gist of it and get quicker at every drawing. Fun, eh! The second great thing is that you will be able to test different animation movements and learn from it. Now, let’s get to part 3!

Step 3: make your illustrations come to life
Great, now you have a bunch of cute illustrations, ready to get animated! We will be using the traditional animation technique, which is frame by frame. But since a GIF can be very short and looped forever, we will fake a long motion by drawing 3 different frames and alternating them.

You will use the first drawing as a base layer, and playing with its opacity, draw on another layer the first movement. then repeat that step on another layer and you will have your 3 sheets of illustrated goods.
This can actually be a bit boring as you have to redraw every illustration at least 3 times. But hey, once it is done, you will be able to enjoy those animations literally forever!

Step 4: photoshop is your friend
If you were using Procreate, export your document as a PSD and open it on Photoshop. You now have in your possession a PSD with multiple layers, each layer representing a frame in your animation.
This is where it gets a bit technical, but also, photoshop is an amazing software and multiple methods can get you to Rome. This is how I do it, but it’s not the only way.
- Create single smart objects out of each layer and make sure they are at 100% opacity
- Open the Timeline window and click on “Create video timeline”. Once the timeline appears, click on the bottom left button (that looks like 3 rectangles) that reads “Convert to frame animation”
- Change the 5 sec. timing to 0.1 seconds on the first frame
- Use the crop tool to focus on your first illustration only
- Make the first layer only visible, then add a new frame by clicking on the “+” button on the bottom of the Timeline window. Then make the second layer only visible, and repeat. Same for layer 3 ; to make the animation smoother, the frame 4 will be the layer 2 again, and voila!

Once you have made one gif, export it using those settings. Then select all the layers and move them in order to focus on another illustration, crop it if needed, save it under another name so that GIF 1 is saved and locked forever. Repeat until all illustrations are animated and saved both in PSD and in GIF. It is time to finish this project, onto final step 5!

Step 5: upload them on giphy share them all
Create a Giphy account and upload your new babies. Use hashtags to make them easier to spot and use all over internet. Make one of the hashtag your username so that when you look up your name, we find your gifs.
And that concludes this tutorial, guys! You know everything there is to know about gif makin’! Now go ahead and draw something fun, share your message, spread your creativity!


You must be logged in to post a comment.